Introduction
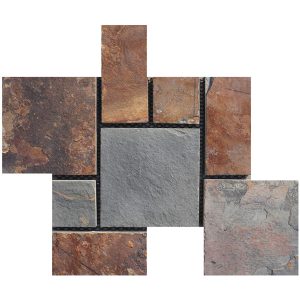
Cultured stone, also known as manufactured stone or faux stone, has become a popular choice for homeowners and builders looking to achieve the look of natural stone at a more affordable cost. Made from a mixture of cement, aggregates, and pigments, cultured stone can be molded and colored to resemble a wide variety of natural stones, such as granite, limestone, and slate.
While cultured stone is durable and low-maintenance, it is not immune to damage over time. Cracks, chips, and discoloration can occur due to a variety of factors, including weather exposure, improper installation, and accidental impact. Fortunately, with the right tools and techniques, it is possible to repair and restore cultured stone to its original beauty.
In this comprehensive guide, we will explore the common types of damage that can occur to cultured stone, the tools and materials needed for repair, and step-by-step instructions for addressing various repair scenarios. Whether https://www.fs-slate.com/fs-028g/ are a homeowner looking to tackle a small repair project or a professional contractor seeking to expand your skillset, this guide will provide you with the knowledge and confidence to effectively repair cultured stone surfaces.
Types of Cultured Stone Damage
Before diving into the repair process, it is important to first identify the type of damage that has occurred to the cultured stone surface. Understanding the nature of the damage will help determine the appropriate repair method and ensure a successful outcome. Here are some common types of damage that can occur to cultured stone:
1. Cracks: Cracks can develop in cultured stone due to structural settling, impact from heavy objects, or freeze-thaw cycles. Cracks can compromise the integrity of the stone and should be addressed promptly to prevent further damage.
2. Chips: Chips are small, localized areas of damage where a piece of the stone has broken off. Chips can be caused by accidental impact or improper handling during installation.
3. Stains: Stains can occur on cultured stone surfaces due to exposure to harsh chemicals, organic matter, or mineral deposits. Stains can detract from the appearance of the stone and may require specialized cleaning techniques to remove.
4. Fading: Over time, cultured stone surfaces may fade or discolor due to exposure to sunlight, moisture, or atmospheric pollutants. Faded stone can appear dull and lackluster, diminishing the overall aesthetic appeal of the surface.
5. Efflorescence: Efflorescence is a white, powdery deposit that can form on the surface of cultured stone due to the migration of soluble salts within the stone matrix. Efflorescence is not only unsightly but can also indicate underlying moisture issues that need to be addressed.
Tools and Materials for Cultured Stone Repair
To effectively repair cultured stone surfaces, you will need a variety of tools and materials to help you achieve professional results. Here is a list of essential tools and materials for cultured stone repair:
Tools:
- Safety goggles and gloves: To protect yourself from dust, debris, and chemicals during the repair process.
- Dust mask: To prevent inhalation of dust particles generated during cutting and sanding.
- Chisel and hammer: For removing damaged sections of stone and creating clean edges for repair.
- Diamond blade grinder: To cut and shape replacement stone pieces to fit the damaged area.
- Wet saw: For cutting larger sections of stone with precision.
- Sandpaper or sanding block: For smoothing rough edges and blending the repair with the surrounding stone.
- Caulking gun: For applying adhesive and sealant to the repaired area.
- Paintbrushes: For applying sealant and touch-up paint to the repaired area.
Materials:
- Cultured stone patch kit: Includes pre-mixed patching compound, pigments, and sealant for repairing minor cracks and chips.
- Replacement cultured stone pieces: To match the color and texture of the existing stone for more extensive repairs.
- Adhesive: High-strength construction adhesive for bonding replacement stone pieces to the substrate.
- Sealant: Clear or colored sealant to protect the repaired area from moisture and stains.
- Touch-up paint: Matching paint to blend the repaired area with the surrounding stone.
Step-by-Step Cultured Stone Repair Process
Now that you have gathered the necessary tools and materials, it's time to begin the cultured stone repair process. Follow these step-by-step instructions to effectively repair cracks, chips, stains, and other types of damage to cultured stone surfaces:
1. Prepare the Work Area:
- Before starting the repair, ensure the cultured stone surface is clean and free of dirt, debris, and loose particles. Use a mild detergent and water to clean the area, and allow it to dry completely.
- Protect surrounding surfaces and landscaping with plastic sheeting or drop cloths to prevent damage from dust and debris generated during the repair process.
- Put on safety goggles, gloves, and a dust mask to protect yourself from potential hazards.
2. Assess the Damage:
- Carefully inspect the cultured stone surface to determine the extent and type of damage that needs to be repaired. Note the location and size of cracks, chips, stains, or other imperfections.
3. Repair Cracks and Chips:
- For minor cracks and chips, use a cultured stone patch kit to fill the damaged area. Follow the manufacturer's instructions for mixing the patching compound and applying it to the damaged area.
- Use a putty knife or trowel to smooth the patching compound and blend it with the surrounding stone. Allow the compound to dry completely before sanding and sealing the repaired area.
4. Replace Damaged Stone Pieces:
- For larger cracks or chips that require replacement stone pieces, carefully remove the damaged sections using a chisel and hammer. Create clean edges and a smooth surface for the replacement pieces to adhere to.
- Use a diamond blade grinder or wet saw to cut replacement stone pieces to fit the damaged area. Test the fit of the replacement pieces before applying adhesive.
- Apply a generous amount of construction adhesive to the back of the replacement stone pieces and press them firmly into place. Hold the pieces in position until the adhesive sets.
5. Sand and Seal the Repair:
- Once the adhesive has cured, use sandpaper or a sanding block to smooth any rough edges and blend the repair with the surrounding stone. Take care to match the texture and profile of the existing stone.
- Apply a clear or colored sealant to the repaired area to protect it from moisture and stains. Follow the manufacturer's instructions for proper application and drying time.
6. Touch Up Paint (if necessary):
- If the repaired area stands out from the surrounding stone due to color discrepancies, use matching touch-up paint to camouflage the repair. Apply the paint with a small brush and feather the edges for a seamless finish.
7. Clean Up:
- Remove any protective coverings from surrounding surfaces and landscaping.
- Clean your tools and materials with water or a designated cleaning solution to prevent buildup and ensure their longevity.
- Dispose of any waste materials in accordance with local regulations.
Maintenance Tips for Cultured Stone Surfaces
To prolong the life and beauty of your cultured stone surfaces, it is important to perform regular maintenance and care. Here are some tips to help you keep your cultured stone looking its best:
1. Clean Regularly: Use a mild detergent and water to clean cultured stone surfaces periodically to remove dirt, dust, and grime. Avoid using harsh chemicals or abrasive cleaners that can damage the stone.
2. Avoid Impact: Cultured stone surfaces are durable but can be chipped or cracked by heavy impacts. Take care when moving furniture or equipment near cultured stone surfaces to prevent damage.
3. Seal Annually: Apply a clear sealant to cultured stone surfaces annually to protect them from moisture, stains, and fading. Follow the manufacturer's instructions for proper application and drying time.
4. Address Issues Promptly: If you notice cracks, chips, stains, or other damage to cultured stone surfaces, address them promptly to prevent further deterioration. Small repairs can help prevent larger issues down the line.
5. Consult Professionals: For extensive damage or repairs beyond your expertise, consider consulting with a professional contractor or stonemason who specializes in cultured stone repair. They can provide expert advice and ensure the job is done correctly.
Conclusion
Cultured stone surfaces can enhance the beauty and value of your home, but they require proper care and maintenance to stay looking their best. By understanding the common types of damage that can occur to cultured stone and following the step-by-step repair process outlined in this guide, you can effectively restore your cultured stone surfaces to their original beauty.
Remember to use the right tools and materials, take safety precautions, and perform regular maintenance to keep your cultured stone surfaces in top condition. Whether you are a DIY enthusiast or a professional contractor, with the knowledge and skills gained from this guide, you can tackle cultured stone repair projects with confidence and achieve professional results.